Chapter 6. The Mozilla Web Browser
Once you have configured your Internet connection (see Chapter 5), you are ready to get online. Red Hat Linux comes with the open source browser Mozilla. This chapter explains how to customize Mozilla so you can surf the Web, send and receive email, subscribe to newsgroups, and create webpages.
Mozilla functions like any other Web browser. It has the standard navigation toolbars, buttons, and menus. To learn more about browser basics, go to the section called Basic Web Browser Navigation in Appendix A.
Mozilla User Accounts
Before you open Mozilla for the first time, you must create a user account. This feature gives you added security if you share a computer with others and helps you stay organized by creating separate user accounts for business use, personal use, etc.
Click on the Mozilla icon on the panel, or, in GNOME, go to Main Menu => Programs => Internet => Mozilla Profile Manager. In KDE, go to Main Menu => Internet => Mozilla Profile Manager. If you have been using Netscape, you can select Migrate Netscape Profile instead of the profile manager option and all of your existing accounts, bookmarks, etc. will be integrated into Mozilla for you.
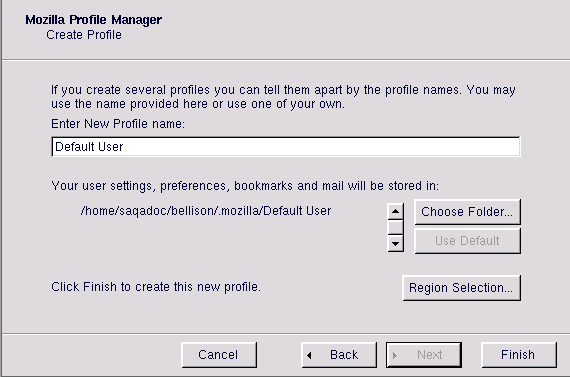
After you open the profile manager, click on Create Profile (Figure 6-1) to begin. The first screen is an introduction; click on Next to continue. On the following screen (Figure 6-2), enter a name in the Enter New Profile Name field (work, Joe, research, etc.). You can also choose where your settings will be stored by clicking on Choose Folder, or just accept the default location that appears.
When you click on Finish, you will see the user profile you just created listed under Available Profiles on the main Profile Manager screen (Figure 6-1). You can also edit and delete profiles from this screen by clicking on Rename Profile or Delete Profile.
Now that you have created a user profile, click on Start Mozilla (Figure 6-1) to launch the application or click on Exit to close it.

