CONTENTS
1. System requirements
2. Preparing hard drive Partitions
    2.1 Tools for Windows/DOS
    2.2 Tools for Linux
    2.3 VectorLinux Included Tools
3. Obtaining VectorLinux
    3.1 Tools for Windows
    3.2 Tools for Linux
4. Installing VectorLinux
    4.1 Supported controllers
    4.2 Direct ISO Install on a Windows Host
    4.3 Direct ISO Install on a Linux Host
    4.4 Bootable CD Install
    4.5 Floppy and CD Install
5. Installation process: step by step
6. Post-install configuration
    6.1 Set up Lilo
    6.2 Configuring VectorLinux
7. Using the system for the first time
    7.1 Login to VectorLinux
    7.2 System administration
    7.3 Create passwords and users
    7.4 Reboot and Shutdown
 8. Enjoy the fruits of your labour
 9. Troubleshooting
10. Credits
Getting Started
Welcome to VectorLinux. Our
distribution has two mottos:
- When choice matters: we provide you
with the option to actually run a full Linux operating system on older computers, a choice of versions and a choice of desktop environments.
- At the speed of light: we have
optimized bootup and shutdown scripts, removed unnecessary
processes and provide efficient software to make VL run very fast
and make you more productive.
To achieve our goals, VectorLinux
releases several editions - called the Standard, SOHO, Deluxe,
Live and LITE editions. The Standard Edition is our "foundation"
distribution - a fast, stable, minimal but complete distro that fits on ~3GB of
hard drive space and includes the fast but complete xfce desktop environment. It will work well on most older
computers and positively flies on newer ones! The SOHO Edition
(Small Office, Home Office) includes the more extensive KDE desktop
environment along with OpenOffice and many office and multimedia
applications for today's modern computers. The Deluxe Editions are
available for purchase in Standard or SOHO CD's along with a second CD with 1000MB of
extra applications including FreeRock Gnome, KDE, Enlightenment17, Opera and others. You help support VectorLinux by purchasing our Deluxe Versions. The Live version enables you to use VL's fast, secure operating system on any computer, or to try out VectorLinux for the first time without actually installing. The LITE edition is for those with old computers, low RAM or dialup Internet. Each edition has a distinctive set
of software, therefore different editions have specific hardware
requirements. Please ensure you have read the requirements for the
edition you are about to install before proceeding. The good news
is that the installation procedure for all editions is basically
the same and is very fast.
Top
1. System Requirements
The following table lists system requirements
for the various editions of VectorLinux:
| Item |
Standard |
SOHO |
Deluxe |
Live |
LITE |
| Processor |
Pentium |
Pentium III |
Pentium III |
Pentium III |
Pentium |
| Memory |
128 MB |
256 MB |
256 MB |
256 MB |
64 MB |
| Hard Drive (root) |
2000-3000 MB |
3000-5000 MB |
3000-6000 MB |
not applicable |
1000-2000 MB |
| Hard Drive (swap) |
256 MB |
512 MB |
512 MB |
not applicable |
128 MB |
| Hard Drive (home) |
as needed |
as needed |
as needed |
not applicable |
as needed |
| Video |
800x600 pixels, 16 bits color |
1024x768 pixels, 24 bits color |
1024x768 pixels, 24 bits color |
1024x768 pixels, 24 bits color |
800x600 pixels, 16 bits color |
Of course, you
will also need a compatible keyboard, mouse, and a CDROM drive. Other
hardware components such as a network card, modem, sound card,
CD-writer, DVD, printer, etc., are optional. Linux also supports
modern USB devices including pen drives, digital cameras, and
scanners.
Top
2. Preparing Hard Drive
Partitions
Before an
operating system or data can be stored on a hard drive that drive
must be partitioned and then each partition must be formatted for a
specific filesystem. A partition is a "part" of the drive. In the
Microsoft Windows or Ubuntu install process on a new hard drive usually only one
partition and one filesystem encompassing the entire hard drive is
created. This process tends to be hidden from the user. VectorLinux,
on the other hand, provides you with the option and ability to
resize that partition or create additional partitions with
different filesystems. This enables you to have more than one
operating system on one hard drive and enables easier and more
secure backups.
As you can see
in the requirements above, VectorLinux recommends three hard drive
partitions with their own specific sizes:
- Root partition: this is the main
partition to install the Linux system and all software
programs. See the table above for our recommended minimum root partition sizes for each VL version. You should also include additional space to install other applications at a later date.
- Swap partition: required to enable
virtual memory. It expands the capacity of your actual memory
(RAM), so that you can run more programs at the same time. It
should be twice the size of your actual computer's RAM, up to a recommended maximum of 512MB.
- Home partition: for storing your own
data. You need to decide how large this should be. If you intend to store lots of music and video files it will need to be at least 10GB in size. Normally, most users use up as much of the remaining hard drive space as possible for their home partition.
You may prepare these partitions prior
to the installation by using partitioning software (discussed
below) or you may actually prepare your hard disk partitions during
the install process (this method is easier). You should at least know the partition sizes
you want for root, home and swap beforehand. It is a relatively
easy process. The difficult part is planning the partition layout
of your hard drive, especially if you want to install VectorLinux
alongside other operating systems such as Windows.
When you buy a
new computer, usually it has a pre-installed Windows operating
system that occupies the entire hard drive (drive C:\). However,
you may discover that most of the hard drive is unused (free) and
going to be wasted. Fortunately, a modern larger hard drive (say >= 40
GB) can be divided into smaller partitions (ten partitions of 4 GB
each, for example). Each partition can then be used for a different
purpose, enabling you to install many operating systems on one hard
drive, and boot whichever partition you choose to. This is called
multi-booting.
If you create
more partitions, Windows OS automatically presents them as drive
C:, D:. E:, etc. However, Linux uses a different notation. Firstly,
a computer may have more than one hard drive. Linux maps each hard
drive as a device. For example:
- /dev/hda : primary controller Master
IDE drive.
- /dev/hdb : primary controller Slave
IDE drive.
- /dev/hdc : secondary controller
Master IDE drive.
- /dev/hdd : secondary controller
Slave IDE drive.
- /dev/sda : first SCSI
device.
- /dev/sdb : second SCSI
device.
If you have only one IDE hard drive, it
is almost certainly "/dev/hda". The second hard drive could be
/dev/hdb or /dev/hdc, depending on which controller it is
installed.
Next, each hard
drive can be divided into four PRIMARY partitions. For the first
hard drive (/dev/hda), they are mapped as /dev/hda1 .. /dev/hda4,
respectively. But what if you want more than four partitions?
Unfortunately, four is a legacy
limit you can do nothing about. The work-around is that one of the
primary partitions (/dev/hda2 .. /dev/hda4) can be used as an
EXTENDED partition. Inside the extended partition, you may create
more LOGICAL partitions. The logical partitions are named
/dev/hda5, /dev/hda6 and so on.
With that basic
partition theory, let's get back to business. We need three
partitions to install VectorLinux. So, if you use this hard drive
entirely for VectorLinux, a possible partition layout is:
- /dev/hda1 (primary): swap (say 512
MB)
- /dev/hda2 (primary): root ( say 6000 MB)
- /dev/hda3 (primary): home (at least
500 MB and probably much more). Most people use up the entire remaining free space of their hard drives as the home partiton, leaving them lots of room for music and video files. You can resize this partition later if you need to create other partitions.
If you want to
install VL alongside MS Windows, things become complicated because
now we need more than four partitions. Here is the recommended
partition layout in such a case:
-
/dev/hda1 (primary): Windows C:
Windows (9x/NT/2000/XP,...) should be installed on the first
primary partition. Also, it is easier to install Windows first and
Linux second.
-
/dev/hda2 (primary): Extended
This partition is used to hold the logical partitions.
-
/dev/hda5 (logical) : Windows D:
Use drive D: to store files you would like to share between
Windows and Linux. You should format this partition as FAT32. Do
not use NTFS.
-
/dev/hda6 (logical): swap
Swap partition used for virtual memory.
-
/dev/hda7 (logical): / (root)
Install all the VL system files here
-
/dev/hda8 (logical): /home
This is for storing your data.
All right, that's the plan. Now we can
start to actually create these partitions. To accomplish this we
need partitioning software utilities. Assume that the initial hard
drive has one drive C: with Windows on it, and we want to
multi-boot it with Linux. The general steps are as follows:
- It is always recommended that before
any re-partitioning of a drive with Windows on it that you run a scandisk and defragmentation on the
drive. Of course, you should also make a backup of your important
files.
- Use the resizing utility (see below)
to shrink the drive C: (/dev/hda1), so you generate enough free
space for the new partitions.
- Use a Windows compatible
partitioning program to create /dev/hda2 and /dev/hda5.
- Use any partitioning program to
create /dev/hda6 through /dev/hda7.
You have several choices to accomplish
that:
2.1 Tools for
Windows/DOS
Partition Magic is a popular commercial product for
non-destructively resizing, partitioning and formatting the
partitions. The GUI interface makes it easy to use. It is highly
recommended. You might also try the free Ranish Partition
Manager.
A second
free alternative is using Fips (resizing) and fdisk (partitioning).
Fips is a free DOS program for non-destructive splitting of hard
drive partitions. It will not resize NTFS partitions but it will
resize DOS, FAT and FAT32. The fips package comes with it's own
extensive documentation,
so please take the time to read it before attempting to resize or partition
your drive with this method. Fips is provided on the VL install CD.
Meanwhile, fdisk, which does not resize but does modifiy and create
partitions is a standard tool found on every DOS/Windows
installation.
2.2 Tools for Linux
We recommend The GParted LiveCD.
This is a small, efficient, live Linux system on a bootable CD that provides "GNU Parted" a program for
creating, destroying, resizing, checking and copying partitions, and the file systems on them, including Microsoft's NTFS fielsystem (found on Windows 200, Windows XP and Windows VISTA). You can also use "QTParted", a Partition Magic clone that is found on many other modern Linux Live CD's.
2.3 VectorLinux Included
Tools
The VL
installation CD includes a resizing utility (GNU Parted) and the
partitioning utilities fdisk and cfdisk. The install program
provides friendly menus for them. So don't worry -if you have not
prepared the partitions ahead of time using one of the tools
mentioned above, you may use the provided tools during the actual
install - in fact we recommend this.
Top
3. Obtaining
VectorLinux
Each edition of
VectorLinux is distributed as an ISO (.iso) file. To obtain it and
prepare it for installation the steps are:
- Decide which edition of VectorLinux
you want. Download the ISO image file (.iso) and the corresponding
md5 checksum file (.md5). The download sites are listed at the VectorLinux
website and also in the Overview Document.
- You should check the image file
before burning it to a CD, to make sure it has not been corrupted
during download transmission. For that, you need to do an "md5sum
check", that means comparing the "fingerprint" of your image file
(.iso) against the fingerprint stored in the checksum file
(.md5).
- Note that VL allows you to install
the .iso file directly without actually burning to a CD first (see
Install Methods below), so if you do not wish to burn a CD you
don't have to. If you do: burn the image onto a CD using a
CD-writer. You must burn the .iso image as an IMAGE. If you burn
the .iso as a file you will not be able to boot your new CD. Check
your CD burning software documentation on how to burn as an
"image". It is recommended that you burn at a low speed onto
quality media to ensure an accurate burn.
If you don't have a good, fast Internet
connection, or a CD-writer, you may order a well-prepared CD from
our store.
3.1 Tools for
Windows
You may
download the ISO image and MD5 checksum using any web browser, FTP
client, or download manager. However, some web browsers
(Internet Explorer, for instance) have a tendency to
rename .md5 files as .htm or .txt. You can
just rename it back to .md5.
For integrity checking,
download and unzip the GUI tool md5summer. Make sure you are using
version 1.2.0.5 or above. On initial use it asks permission to
associate the extension .md5 with itself. If you agree, you just
need to double-click on a .md5 file to check the integrity of the
original file (as long as they are both in the same folder).
Otherwise, you have to manually browse to the .md5 file within the
md5summer interface, then click on the "Verify sums" button and select the .md5
file. If you get an OK for the VL .iso image file, you can proceed
to burn it as an image (see notes above re proper
burning).
There is another tool you could use
(this one is command line driven):
-
Download the following file:
http://theopencd.sunsite.dk/md5sum.exe
or get it from here:
http://www.etree.org/md5com.html
-
Put it into your system folder
(c:\windows\command for Win95/98/ME or c:\winnt\system32 for
NT/2K/XP). Alternatively, you could just put it in the same folder
as the .iso and .md5 files. If you do that though, it will not be
available system-wide.
-
Open a DOS box by clicking the "Start" button, then "Run", then type "command"
if you are using Windows
9x/ME or "cmd" if you are using Windows NT/2K/XP,
and click "OK". You are now at what is called a "DOS/command
prompt". It is worthwhile learning to use the DOS
prompt!
-
Go to the folder where the .iso and the
.md5 files are located, for example:
cd
\download
-
Type the following command and then press
enter:
md5sum -c
vl-5.0.iso.md5
If the image is alright, you should
get a "file is OK" message.
After that, you may want to burn the ISO
image onto a CD (but you don't have to - see below). For this, use
the program that is provided by your CD-writer (e.g: Adaptech CD
Writer, or Nero Burner). Ensure you burn as an IMAGE not as a file.
It is also recommended you burn onto quality media at a low
speed.
3.2 Tools for Linux
Most Linux systems already have the tools.
Here is how to do that on Linux console/terminal in three
steps:
-
Downloading the ISO image and MD5:
nohup wget ftp://anymirror/path-to/veclinux-5.9/iso-release/vl-5.9.???.iso
nohup wget ftp://anymirror/path-to/veclinux-5.9/iso-release/vl-5.9.???.iso.md5.txt
-
Checking the integrity:
md5sum -c vl-5.9.???.iso.md5.txt
-
Burning the ISO onto a CD:
cdrecord -v fs=6m speed=4 dev=2,0 vl-5.9.???.iso
Of course you can always use graphical
GUI software alternative such as k3b, xcdroast or graveman.
Top
4. Installing
VectorLinux
To obtain VectorLinux you need to either purchase a Deluxe CD from our CD Store or download an "iso" image from a VectorLinux mirror site. Once connected to the mirror site navigate to the ...distr/vectorlinux/veclinux-5.9 directory at the mirror site you have chosen. Within that directory you will see two subdirectories: /iso-release and /iso-soho (amongst others). The /iso-release directory is where you will find iso images for the VL 5.9 Standard and VL 5.9 Standard Live Editions. The /iso-soho directory is where you will find iso images for VL 5.9 SOHO Edition. Then download your iso of choice.
Prior to starting the installation,
you must know two things: 1) what type of hard drive controller
your computer has and 2) which method you will use to install.
Today, there are three common hard drive controllers: IDE, SCSI,
SATA and Adaptec(for CDROMS). You must boot the installation using the kernel that supports
your controller. The default kernel works for SATA-IDE drives. The second concern is which install method to use.
This depends on the capability of the target computer. VectorLinux
can be installed via one of these methods:
- Direct ISO File from a Windows host.
- Direct ISO File from a Linux host.
- Bootable CD.
- Floppy disk and CD.
4.1 Supported
controllers
VectorLinux supports and can be installed on systems
using IDE/ATA hard drive controllers, which at the moment of this
writing is the most popular one in standard desktop systems.
Another well known standard is a SCSI controller, but due to its
high pricing, it is only common on commercial server systems.
Meanwhile, the emerging standard is SATA (Serial ATA) hard drive
controllers, which are being commonly incorporated by motherboard
manufacturers into newer computers.
If you are
having difficulties using your SATA drives, make sure you have set
the BIOS correctly. In a nutshell, set the BIOS to "Enhanced
mode SATA only". This is counterintuitive, but it means use
enhanced mode only on the SATA, not just use the SATA and
turn off the PATA. If you set it to enhanced mode SATA+PATA, the
kernel will lock as it tries to use an IDE driver for the SATA
controller. Your symptoms will be that the kernel install may hang
after detecting hda - hdd.
Please know your hard drive
controller type because it determines the kernel required for
installation. The default kernel supports the SATA/IDE controllers (this is the one for probably 98% of workstation computers on the market). Otherwise, you need to specify either "scsi" or "adaptec" kernel during the
install.
4.2 Direct ISO on a Windows
Host
This is a new method that will save you having to
burn a CD. Assume that you already have Windows running on the
computer, and the partitions have been prepared as suggested above.
- Download your iso of choice as described above. Move it to the top
level directory (C:\ or D:\). Don't forget to check its integrity
as explained previously.
- You MUST now rename the iso to follow DOS 8.3 filename specs (e.g. VL58.ISO, not vl58.1.24vl5.iso), and the filename should be all capital letters.
- The next files should be placed into
C:\loadlin
- loadlin.exe
Get it from “install/loadlin/” directory within the
FTP site.
- initrd.img
Find it as “isolinux/initrd.img” within the FTP
site
- The kernel file that matches
your system (ide, scsi, sata, adaptec)
You may select one of them from “isolinux/kernel/”
directory within FTP site.
Then proceed with the
installation:
- Shutdown Windows to DOS
mode.
- Type “cd C:\loadlin”
<enter> (without quotes)
- Type “loadlin ide
root=/dev/ram rw initrd=initrd.img” <enter> (without
quotes).
You should replace the
“ide” with the name of the kernel that you downloaded
earlier. The standard installation process will be
started.
4.3 Direct ISO on a Linux
Host
If you have another Linux running on the
computer, this method will be easy. You need to download the
following files into a directory (e.g: /home/download):
- The chosen VectorLinux ISO image
file.
- vlinstall-iso
Find it as “install/vinstall/vinstall-iso” within the
FTP site
Now go to the text console (press
Cntrl-Alt-F1) and login as root. Proceed as follows:
- Switch to run level 2 (or 3 in
Slackware/Redhat, etc)
init 2 <enter>
- Go to the directory where you
downloaded the files, i.e.: /home/download
cd /home/download<enter>
- Now, install using the ISO file
./vinstall-iso vl-5.0.iso <enter>
4.4 Bootable CD
Use this
method if you already have the VL install CD, and your computer is
capable of booting it.
First, you may need to change the
boot order. Changing the boot order allows your system to boot from
different devices like your hard drive, floppy drive or CDROM
drive.
When you select an installation method, you might have to set up
your system to boot accordingly. To do this, immediately after
your computer starts up go to the BIOS options setup screen
(1). There should be an option for boot order (general
options are C drive, A drive, CDROM drive, etc). Choose which
should boot first (in this case CDROM drive), save out of the BIOS
screens and restart the computer. You can change the boot order
back when you are finished installing VL.
Note:
(1)Not all systems use the "Delete" key to enter the BIOS.
Some systems use one of the function keys (F1-F12). Some use a
combination of keystrokes. Often the initial boot screen when you
turn on your computer will tell you which keystroke to use to enter
the BIOS setup. If not, check your computer or motherboard
manual. Failing that check your computer manufacturer's website documentation for your specific computer model #.
After the boot order is properly
set, place the VL installation CD in the CD drive and reboot the
system. The boot process will give you a prompt. This is the chance
for you to select the correct kernel that supports your controller.
If you do NOT have a SCSI or Adaptec controller (98% of machines don't), then simply press [enter] to
use the default kernel (sata/ide). Otherwise, type the kernel you want,
e.g:
boot: scsi
[enter]
That's it. The install procedure will
then be started.
4.5 Floppy
Install
This method
allows you to install VectorLinux using the VL CD (any edition) and
two floppy disks. You may have to use this method if the target
computer cannot boot from the CD (especially on older laptops). We
assume that you already have the VectorLinux CD prepared and ready.
You may use it to create the floppies on another Windows or a Linux
host. Preparation on a Windows HOST is as follow:
On a Linux host, the preparation is as
follows:
- Launch a terminal
- Insert the CD and mount
it.
mount /dev/cdrom /mnt/cdrom
- Insert blank floppy #1, write the
kernel image into it using this command:
cat /mnt/cdrom/install/floppy/bare.i > /dev/fd0
- Take out floppy #1, Insert floopy
#2, enter this command:
cat /mnt/cdrom/install/floppy/rootdisk.img > /dev/fd0
Now with the VectorLinux CD and the two
floppies:
- Set the computer to boot from the
floppy drive
- Insert the CD
- Insert the floppy #1
- Boot the computer
- On the boot: prompt, press
[enter]
- After asked, replace floppy #1 with
floppy #2
- VL install screen will
appear
Top
5. The Installation
Process: Step by Step
When you launch the installation
process, the first screen presented to you lets you choose either the default kernel (IDE/SATA) or another kernel (by pressing F1).

- Start up – On the next screen
you have four options:
- Select the keymap to be used during
the installation. You should select this menu for the first time if
your keyboard in a non-US layout.
- Start the installation. The reason
why we are here!
- Repair lilo (Linux Loader). This is
a handy utility in case you have an installed Vector Linux, but
somehow you cannot boot it because of a corrupted LILO.
- Exit. This will bring you to the
Linux command prompt. It might be required if something is wrong
with the installation and you are capable enough at the Linux
command line to fix it manually.

- Once you start the installation, the
routine will look for the installation media in the following
places:
- Any hard drive partition that
contains installation files
- Any hard drive partition that
contains the ISO file in the top directory
- CDROM drive
If a media is found, it will ask you
to confirm. Select Yes to proceed, No to search another
media.

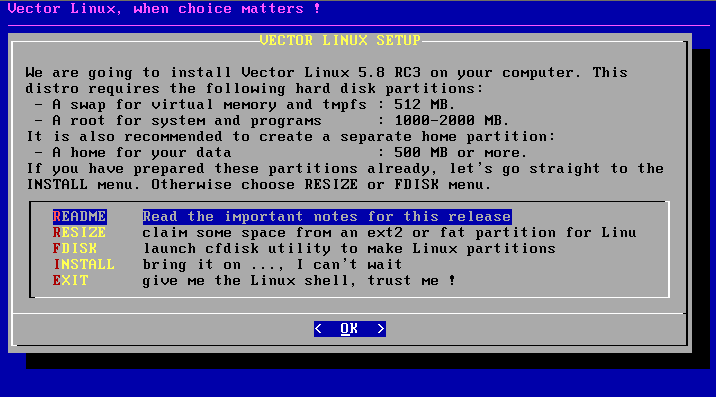
- The next screen shows you the hard
drive requirements of the soon to be installed edition. If you have
already set up your partitions, then start the installation now.
Otherwise you can create or modify the hard drive partitions using the
builtin tools. RESIZE menu is a simple front end for GNUParted.
Meanwhile the FDISK menu will launch a menu-driven partitioning
program called cfdisk (see the three images following). Warning: do not proceed to the INSTALL menu
if you don't have the required 3 partitions (root, swap and home) at the required sizes,
because the install will surely fail.


- You are now presented with a list of
the next steps the routine will perform, it goes through each of
these steps in order.

- In the check-files screen, you may
choose which files are to be verified for any damage or corruption.
If you are confident enough about them you could skip the
verification, but if the files are somehow damaged the installation
will probably fail later. If you have already done an md5sum
check on the .iso file then this step is probably unnecessary.
- Now the routine will present you
with any swap partition detected. Choose the swap partition to use
and select OK..
- The next step is to choose your root
partition. This is the partition on which you want to install
VectorLinux. You will have the chance to select a different
partition for your /home directory later.
- Then select the filesystem you
prefer for the root partition: reiserfs, ext3 or ext2.
ext2 is the older Linux filesystem, reiserfs and ext3 are both
newer and more robust journaling filesystems. ext3 is a general
standard and reiserfs is particularly fast with many small
files.
- Next, you can choose to use a
different partition for your /home directory or use the same one
that is used as root. The "/home" is where files that belong to
users are to be stored, and "root" is where the Operating
System´s files and all packaged software will be stored.


- The next two dialog screens allow you to choose
what main packages and individual software applications you wish to install.


- You are now ready to install
VectorLinux to your system. You can review the choices you have
made and go back and do some modifications, or you can select OK to
continue installing VectorLinux. Once you hit OK, and the
installation proceeds, it will format the partitions you selected
for root and /home, and any information in them will be erased, so
please verify everything before continuing.

The installation will take a little
while, so you may have a short break. The installation time will
vary depending on your system´s speed. It can be as quick as 10 minutes. After some minutes,
your monitor screen may go blank as it enters a power saving mode.
If it does, press [SHIFT] on the keyboard to
restore your monitor. DO NOT hit [enter] or [space] as you could
inadvertently accept a choice the install routine might have
reached at that point.
After the installation is done, you
will be required to do some basic configuration, as explained in
Section 6.
Top
6. Post-Install
Configuration
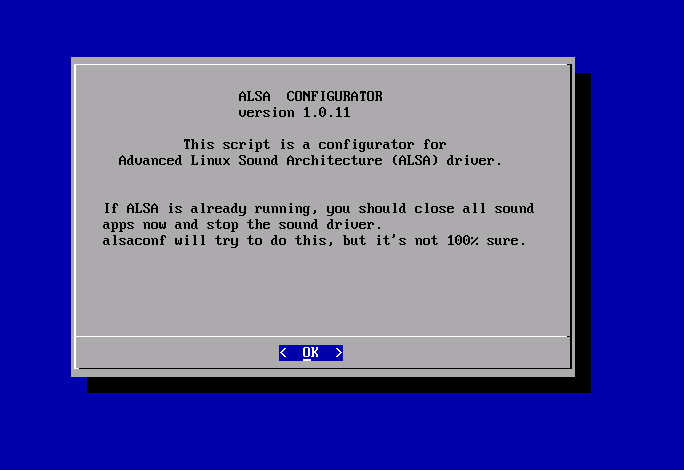
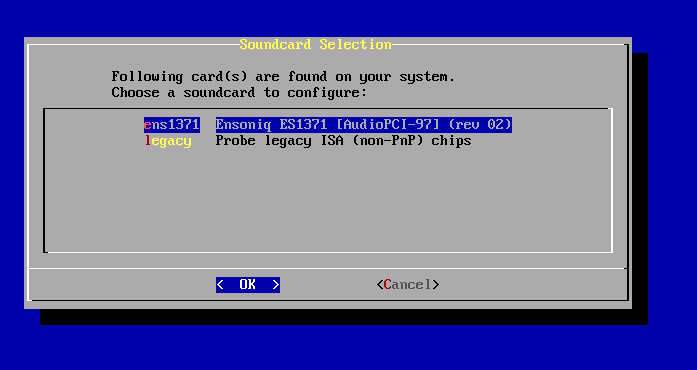
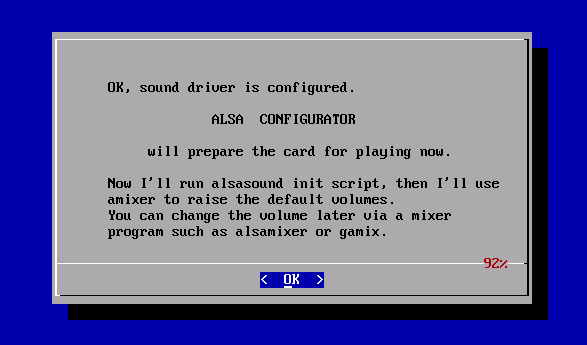
Once VL has been installed, a
configuration screen is presented. This allows you to configure
sound, video, network, etc. This screen can also be accessed later
using "Vasm" as root.
However, it is recommended that you
do not skip this configuration step at
installation time.
6.1 Set Up LILO
You will be prompted to set-up
“LILO”, the Linux Loader that boots the
system.
Choose where to install
lilo:
-
the root partition (if you installed VL to /dev/hda2, this would
install lilo to /dev/hda2)
- the MBR (master boot record) for the disk
- a floppy drive
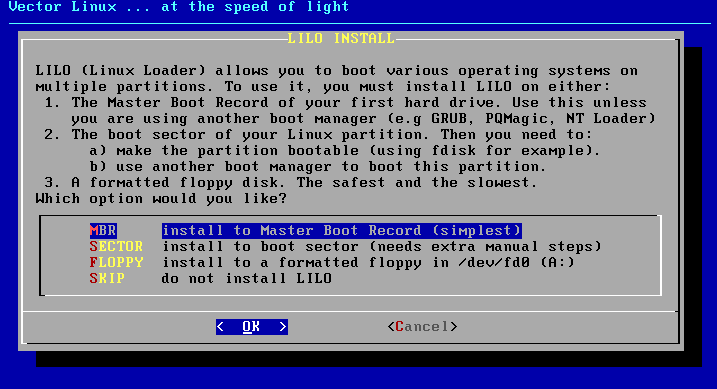
If you want Lilo to take over the
boot process entirely, install to the MBR of the hard disk (this is
the most common scenario). LILO will detect other operating systems on your hard drives and make an entry for them in its boot menu. If you already have another boot manager installed on some partition that can point to your Linux partition,
then you can install Lilo to the root partition where you installed
VL. If you are not sure and you don't want to cause any problems,
install to a floppy. But you must then ensure that your computer's
BIOS is set to boot from the floppy drive first. This is the slowest boot method, and only suggested if you do not want to alter your existing boot manager. For most systems installing to the MBR is safe and easy.
Choose to enable framebuffer or not.
This option affects how the boot process looks, and the onscreen
indications will let you know what option is best for
you.


Add any additional parameter you
need to boot you system. If your system didn´t require any
special kernel parameters to perform the installation, then leave
this field empty.
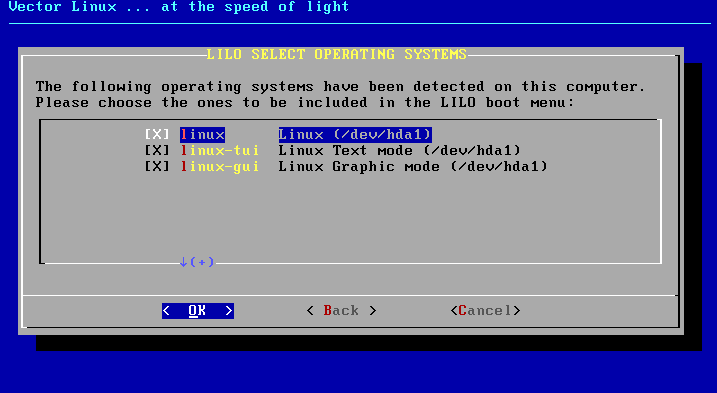
If you have them, Lilo will detect
the partitions and Operating Systems on your hard disk and allow
you to select which ones you want to have available in your new
boot menu.
After you have installed VL, you can
change the lilo configuration by using "vasm" as root, which will
bring up the configuration screen again, or, also as root, you can
edit the
/etc/lilo.conf file by hand. After editing the file, be sure to
issue the following command as root: "/sbin/lilo -v". This will
commit the changes to the lilo bootloader.
6.2 Configuring
VectorLinux
Once Lilo is installed, the next steps are to
configure this new system. If you installed with an ISO file
directly from a Linux host the system will have to reboot first
before doing this next configuration step.
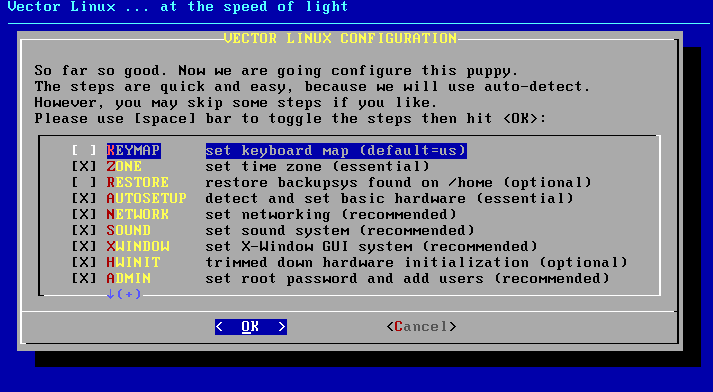
The first
screen shows the configuration steps, and allows you to choose
which ones are to be performed. The wise decision is to select them
all, unless you have experienced problems with a particular step
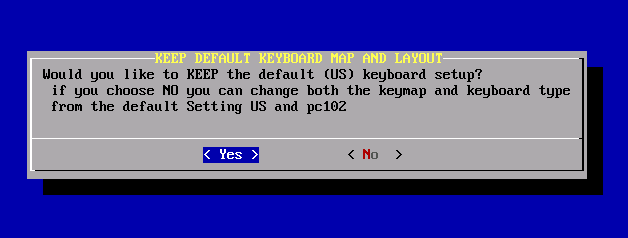
previously. At this point you are walked through a series of
screens to configure the keyboard, auto-setup the basic hardware,
select network settings, set the video, sound, and time zone. The
configuration will try to detect most of the settings
automatically.


In the
last step, the configuration asks you to change the root
(superuser, administrator) password and add the first ordinary
user. Please don't skip this step for your own security. On any
operating system, working daily as root is not advisable, so you
should set up a normal user and use that for normal tasks and
resort to root only for administering the system.
When this is done, you simply press
“OK” to restart the system and boot into VectorLinux
for the first time.
Top
7.
Using the system for the first time
7.1
Login to VectorLinux
If you chose to boot into RunLevel 4 (the X GUI system), when the VectorLinux boot process has been completed you will be presented with a graphical login screen where you should enter your personal user login ID and password (do not use root unless absolutely necessary). After logging in the desktrop environment will load and within seconds you will see the desktop. Have fun!
As well as the GUI desktop, you
will get six text consoles. You may switch between them by pressing [Ctrl]-[Alt]-[F1] through
[Ctrl]-[Alt]-[F7] on the keyboard. You will be asked for a username and
password. If you did not change the root´s password during
installation you should use root as username and leave the password
empty. Otherwise, use the name and password of the account you
created earlier.
If you chose to boot into RunLevel 2 (a text console environment) you may
switch to RunLevel 4 (GUI) by typing:
user:$ startx
Alternatively, you can launch the GUI
login mode by switching runlevel into 4 or 5. Please login as root
on the console, then type:
root:# init 4
7.2 System Administration
If you want to further configure
your system, you can launch VASM (Vector Administration and System
Menu) as root:
root:# vasm

This will bring you a menu that
enables you to administer the VectorLinux system: everything from
adding users to configuring X and your network (see the above link for a complete manual). Some menu items
include:
- USER: add more users, also delete
some.
- X-WINDOW: change various GUI
settings, including switching window managers and GUI login
manager.
- SERVICE: set background services
such as samba, printing, web server, and more.
- NETWORK: you may add more network
cards, set modem and wireless, also enable simple firewall and
Internet sharing.
- HARDWARE: most of this has been
performed during the install. You may redo it again if you add new
hardware.
- FILESYSTEM: allows you to mount more
partitions.
You can run VASM from the console (text
mode) as well as on the GUI. However, if you launch VASM as an
ordinary user, it presents only a limited menu, but allows you to
switch into superuser mode.
7.3
Reboot and Shutdown
There are many ways to reboot the
system, including
- From a console (not GUI) press
Ctrl-Alt-Del
- From a console or GUI terminal, type "reboot"
- From a GUI windows manager, choose "reboot" menu.
Meanwhile, to turn off the system,
you may:
- Type
"halt" or "poweroff" from a console.
- Select "shutdown" menu from a windows manager if
available.
Top
8. Enjoy the fruits of your
labor
Please join our message forum. You
can get information and help there to enhance your VectorLinux
experience (http://www.vectorlinux.com/forum/).
Top
9.
Troubleshooting
Error type
1:
installation gives you a message
saying that it can't find the vector bz2 kernel and / or saying
that /dev/xxxx is not a valid block device.
This error usually appears when you
have more than one optical drive (CD/CD-RW/DVD/DVD-W) and you are
trying to install Vector from the second unit. Move the
installation CD to the first drive.
Error type
2:
Installation halts or does not
start properly after a seemingly correct installation or you get
messages about CRC errors during install
That kind of issue often suggests
file corruption during download or a faulty burning
process.
The first thing to do, if you
haven't already done so, is to check the .iso file for corruption;
please refer to section 3 of this manual. If the .iso file passed
the md5sum integrity check , then you could try burning the file at
a slower speed or use higher quality media.
Remember to burn as a cd image, not
as a conventional file!
Error type
3:
You get one of these two
messages:
Kernel Panic: Aiee, killing
interrupt handler!
In interrupt handler - not syncing.
or
Error! There was a problem!
Code: 39 36 75 03 5b 5e c3 5b 89 f0 31 c9 ba 03 00 00 00 5e e9
cb
Installation not complete
Please press enter to activate this console
Those errors are usually related to
old hardware, and could mean that you need to pass some kernel
commands to the boot process. It could also mean that there is some sort of hardware problem with your computer, but if you had it working previously with another operating system then it is probably one of the following:
Some commands you may try
are:
linux mem=16M (replace 16
with the correct amount of memory in your PC)
linux ide=nodma (disable udma access, for old hard
drives)
These commands disable power
management, Notebooks often require them:
linux noacpi
linux noapm
linux pci=noacpi
linux acpi=off
linux apm=off
Error type
4:
Your SCSI or SATA hard drive is
not available to install VL on it.
The required driver for your SCSI
card is not being loaded, and therefore your disks are not seen by
the install routine.
Error type
5:
Installing from CDROM drive fails
with this error: "mount: /dev/scd7 is not a valid block
device"
Your CDROM or CDRW drive requires
scsi emulation. When the installation greets you with the first
prompt (where it says "boot:" at the bottom left) you should type
:
ide hdx=ide-scsi
(where x is your cd-rom
unit).
If that doesn't work restart and try
writing
scsi hdx=ide-scsi
(where x is your cd-rom
unit).
Note: The Linux Kernel 2.6.x
treats CD-Rx drives in a different way than previous kernels, so
this problem shouldn´t arise, it is still mentioned here for
the record.
Error type
6:
The installation halts somewhere near the end during the install of packages and the install process gives you an error message that it cannot proceed. This often indicates that you may not have apportioned sufficient hard drive space for the "/" (root) partition. VectorLinux requires a minimum of 2GB to install, 3GB for the SOHO edition. You will need to increase the size of the root partition before proceeding to re-install the system. This can be done using cfdisk during the second install screen.
Error type
7:
The installation locks up, with no response from the keyboard, and often occurs right near the beginning of the install process when you see the kernel-loading messages. This usually indicates that you have faulty RAM. Use a Live Linux CD and run "memtest" to confirm that you have a faulty RAM memory module on your computer.
Top
10.
Credits
Copyright 2008 VectorLinux
Released under [GNU Free Document License
[ http://www.gnu.org/licenses/fdl.html
]
Contributed By: Joe1962, Johnvan, Kocil, Monty67, Mutiny,
Shallow, Hal, SuSe-Refugee, UKBill, Lagagnon, Lost & Lovin'
Linux.
|